TL-WR703N Example Project 4 : Webcam Streaming

Connecting a webcam and using the router to stream video around the place should be one of the easiest things to do. A bit too easy in that I neglected to provide simple instructions on how to set it up.

mjpg-streamer and the necessary drivers are included in the standard images I provide on the TP-Link TL-WR703N project page.

Preliminary steps :-

  1. Get a router, load it with the standard image.
  2. Set-up wireless or any other networking changes.  See an example here.
  3. Plug in the camera

Now there are two ways to get mjpg-streamer to auto-start, there is an easy way and an elegant way.

  • Easy way : Just add the command to the auto start script using LuCi…
  • Elegant way : Edit the configuration files /etc/init.d/mjpg-streamer and /etc/config/mjpg-streamer

I prefer the easy way you are less likely to screw it up.  First we should check that the camera works well with mjpg-streamer…

  1. Telnet/SSH into the router
  2. Run the following command :

    mjpg_streamer -i “./input_uvc.so -n -r VGA -f 6 -d /dev/video0” -o “./output_http.so -p 8080 -n”

    This command uses VGA (640×480) resolution “-r VGA” at 6 frames per second “-f 6”.

  3. If that doesn’t work and an error appears, it most likely means your camera doesn’t support JPEG images.  If so, try the following command instead :

    mjpg_streamer -i “./input_uvc.so -n -q 60 -r QVGA -f 6 -d /dev/video0” -o “./output_http.so -p 8080 -n”

    This command forces mjpg-streamer to convert into raw into JPEG at (-q) quality 60, at resolution (-r) QVGA, this can be “160×120” for example.  The frame rate is specified by the -f (6).  This method is MUUUUUUUUCH more CPU intensive and you might have to tweak the resolution and frame rate down.

  4. Using a device connected to the router, use a web browser (e.g. Chrome) to connect to the following to get a live view:

    http://192.168.1.1:8080/?action=stream

    You can also get a single snapshot at:

     http://192.168.1.1:8080/?action=snapshot

  5. If you need to play around with the commands, use CTRL-C to kill mjpg-streamer and try again.  Avoid high resolutions (e.g. 1920×1080) as that will just crash the router.  I used 640×480 at 25 frames per second relatively happily on a JPEG enabled camera (e.g. Logitech/Microsoft ones, not the cheap no brand ones).
  6. Once you have a workable set-up, copy the command you have and put it into the local start-up.  Append the command line with an ampersand “&” so it runs in the background.  e.g.

    mjpg_streamer -i “./input_uvc.so -n -r VGA -f 6 -d /dev/video0” -o “./output_http.so -p 8080 -n” &

    Hint – In Luci, select the Systems tab, then select Startup, scroll down to the Local Startup section and add your command to the box and press save and apply.

Enjoy? 🙂
TL-WR703N Example Project 3 : Wireless 3D printing (or 2D printing or just simply wireless USB)

So it has taken me over three months of procrastination of building a USBIP image that will let me connect to my 3D printer wirelessly to actually writing up a tutorial to share it with the world.  This tutorial provides the basics of setting up a fresh TP-Link TL-WR703N image to wirelessly connect a Windows machine to a USB device attached to the router.  I am using primarily using this to connect to my pp3dp Up! printer (only reason this is for Windows…), but I have also tested this method on a USB Logitech webcam and a USB flash disk.

Again, a disclosure is that I am an affiliate to 3D printing systems and that if you’re interested in buying an Up! Plus or Up! Mini and you’re in Australia/New Zealand you should do it via this link 😛

Continue reading “TL-WR703N Example Project 3 : Wireless 3D printing (or 2D printing or just simply wireless USB)”

TL-WR703N Example Project 2 : Cute Exterminator (Remote Control Toy)

The Cute Exterminator is another demonstration project using the TP-Link TL-WR703N router to create a WiFi enabled remote control toy.  It shows how the router can be used to control servos with minimal programming other than with html/javascript and a single line of shell script.

Again (well I repeat this a lot), not a comprehensive write up because it was a quick a dirty build but read on for the short description and a visual walk-through.

Continue reading “TL-WR703N Example Project 2 : Cute Exterminator (Remote Control Toy)”

TL-WR703N Example Project 1 : BitBltBlade

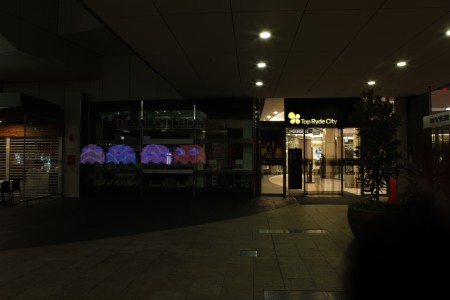
Pacman!
Pacman!

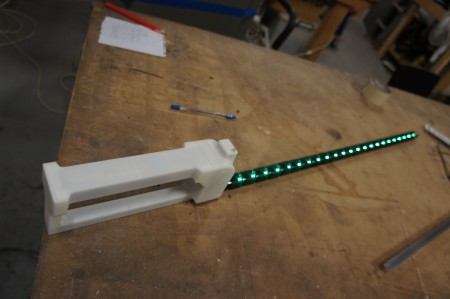
The BitBltBlade is a demonstration project using the TP-Link TL-WR703N router and Kean’s Expander board.  It interfaces with a strip of 24 RGB LED’s for generating images superimposed on backgrounds using long exposure photography.  It is basically a copy of Gavin’s Lightscythe implemented using different hardware and software.

Again this is not a comprehensive write-up, but a quick example of a TL-WR703N project [it took me 8 months to decide to make it, 1 week to actually make it, and 3 more months to decide to write about it OK!  44 weeks of procrastination for 1 week of work so don’t expect too much!].  Short write-ups for the Cute Exterminator and using the router for remote USBIP will come this week.

Project check list :

  • Hack – Using a commercially available router – ✓ Check!
  • Cool – Kean’s expander board for customized hacking – ✓ Check!
  • 3D Printing – Large prints – ✓Check!
  • Bling – FLASHING LIGHTS – ✓ Check!
  • iPhone controlled – actually no, iPhone doesn’t have a file-system to be able to upload the images – iPhone fail
  • Android controlled – Yay – ✓ Check!
  • Looks like a lightsaber bonus – ✓ Check!
Test fit of all components at the Sydney Hackerspace

Continue reading “TL-WR703N Example Project 1 : BitBltBlade”