Project sneak peek and procrastination

This is a project sneak peek at the LED lamp I am making.  This post is really an excuse to post some random pics and videos, and a way for me to procrastinate and not actually finish the darn thing.

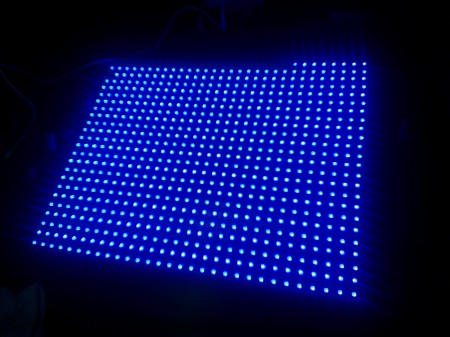
My eyes! My eyes...do not look at LED array with remaining eye...
My eyes! My eyes…do not look at LED array with remaining eye…

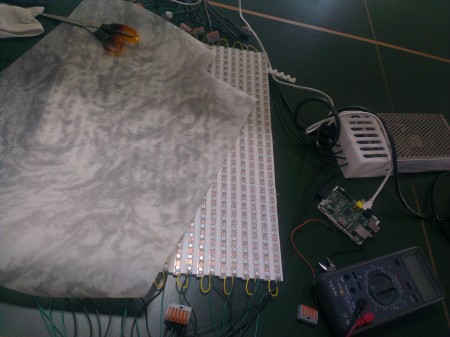
The project is a LED lamp that will be mounted on the wall.  It comprises of 24 LED Strips of 30 LEDs each of which has an integrated WS2811 controller chip that enables individual addressing and 24bit RGB colour.  The strips are driven by a Teensy 3.0, which then subsequently interfaces with a controller board that will do most of the processing.  I hope to have it run games (e.g. Tetris) as well as turn on automatically at night, display the time and temperature and do some other random stuff.

Below is a video testing the display with Tetris…I haven’t drawn the border etc…and the pixels look fugly because it isn’t finished 🙂

The test setup is so crude, I just used scrap washi paper and dumped it directly on-top of the LED array.

Test set-up with scrap washi paper and power supply

I’m still debating on what I should use as a controller for the games.  Waiting on a “DDR mat” from eBay to arrive so I could test that, but I would appreciate any novel ideas people can suggest!

Some more pics after the break 🙂

Continue reading “Project sneak peek and procrastination”

TL-WR703N Example Project 3 : Wireless 3D printing (or 2D printing or just simply wireless USB)

So it has taken me over three months of procrastination of building a USBIP image that will let me connect to my 3D printer wirelessly to actually writing up a tutorial to share it with the world.  This tutorial provides the basics of setting up a fresh TP-Link TL-WR703N image to wirelessly connect a Windows machine to a USB device attached to the router.  I am using primarily using this to connect to my pp3dp Up! printer (only reason this is for Windows…), but I have also tested this method on a USB Logitech webcam and a USB flash disk.

Again, a disclosure is that I am an affiliate to 3D printing systems and that if you’re interested in buying an Up! Plus or Up! Mini and you’re in Australia/New Zealand you should do it via this link 😛

Continue reading “TL-WR703N Example Project 3 : Wireless 3D printing (or 2D printing or just simply wireless USB)”

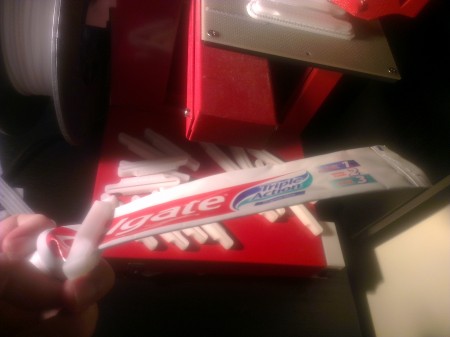
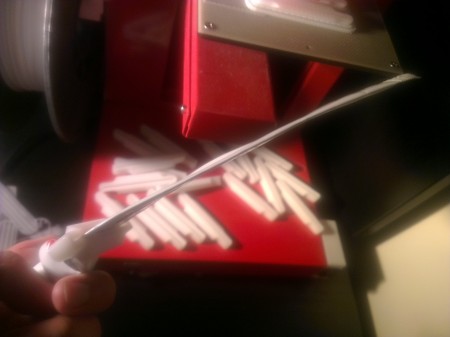
Squeeze! Reducing toothpaste waste…

Self explanatory photo post… or just an example of over-exposed phone photography…

Colgate – All used up…
I’ve really used up the toothpaste now!

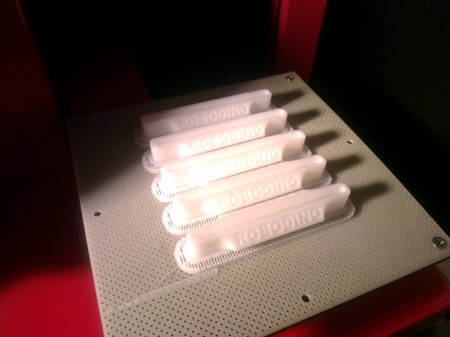
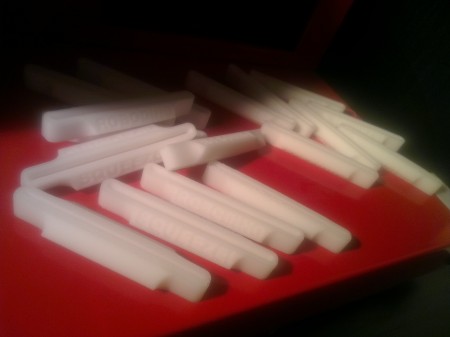
I’m printing a bunch of these to hand out as trinkets at the local hackerspace.  Demonstrates how a 3D printer can be used to make stuff, and handy enough for everyone to be able to find a use for it!

RoboDino Trinket Production 🙂
RoboDino Trinkets

Will be uploading this to Thingiverse in a tick…

TL-WR703N Example Project 2 : Cute Exterminator (Remote Control Toy)

The Cute Exterminator is another demonstration project using the TP-Link TL-WR703N router to create a WiFi enabled remote control toy.  It shows how the router can be used to control servos with minimal programming other than with html/javascript and a single line of shell script.

Again (well I repeat this a lot), not a comprehensive write up because it was a quick a dirty build but read on for the short description and a visual walk-through.

Continue reading “TL-WR703N Example Project 2 : Cute Exterminator (Remote Control Toy)”

TL-WR703N Example Project 1 : BitBltBlade

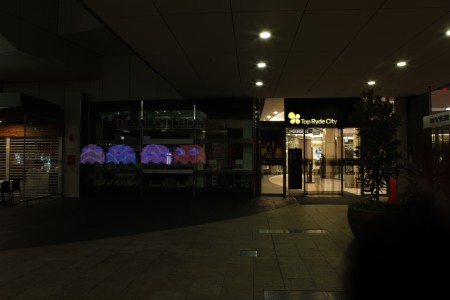
Pacman!
Pacman!

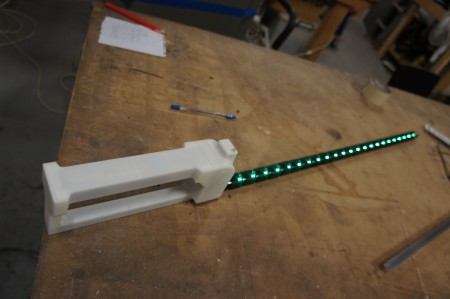
The BitBltBlade is a demonstration project using the TP-Link TL-WR703N router and Kean’s Expander board.  It interfaces with a strip of 24 RGB LED’s for generating images superimposed on backgrounds using long exposure photography.  It is basically a copy of Gavin’s Lightscythe implemented using different hardware and software.

Again this is not a comprehensive write-up, but a quick example of a TL-WR703N project [it took me 8 months to decide to make it, 1 week to actually make it, and 3 more months to decide to write about it OK!  44 weeks of procrastination for 1 week of work so don’t expect too much!].  Short write-ups for the Cute Exterminator and using the router for remote USBIP will come this week.

Project check list :

  • Hack – Using a commercially available router – ✓ Check!
  • Cool – Kean’s expander board for customized hacking – ✓ Check!
  • 3D Printing – Large prints – ✓Check!
  • Bling – FLASHING LIGHTS – ✓ Check!
  • iPhone controlled – actually no, iPhone doesn’t have a file-system to be able to upload the images – iPhone fail
  • Android controlled – Yay – ✓ Check!
  • Looks like a lightsaber bonus – ✓ Check!
Test fit of all components at the Sydney Hackerspace

Continue reading “TL-WR703N Example Project 1 : BitBltBlade”

Larger Mecanum Rover – 3D Print Gallery

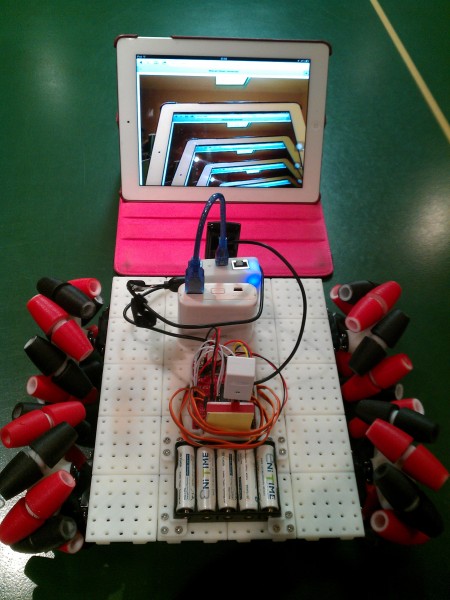
iPad in iPad view with TL-WR703N camera mounted

No actual write-up goes with this post other than a gallery full of photos for 3D printing enthusiasts.  This was an exercise to demonstrate how large models can be printed using the Up! printer [Hah! if you buy use this affiliate code please!].  The hub of the wheels are about at the limit of the platform size of the printer but the body is constructed in a modular manner.

The rover itself is driven by 4 cheap continuous rotation servos like the original, interfaced with a cheap MSP430 Launchpad and controlled by a wireless Wii Nunchuk.  The webcam in the photo above is connected to a TP-Link TL-WR703N which acts as an access point and streams to any WiFi device with a web browser (iPad above…not mine!).

Edit : Forgot to add Youtube test video as usual!

Continue reading “Larger Mecanum Rover – 3D Print Gallery”

TP-Link TL-WR703N Cheap hackable router!

New project page added for the TP-Link TL-WR703N router here :- http://www.madox.net/blog/projects/tp-link-tl-wr703n/

All the installation instructions are inside that page, here are a few draft quick starts :-

Setting up extroot

  1. Partition/format your USB drive to ext4 using a PC/Mac (I didn’t include any fdisk/formatting utils on the image)
  2. In Luci Top Tabs -> System -> Mount Points
  3. Under Mount Points, you should have a disabled mount point /dev/sda1. Click “Edit”
  4. Check “Enable this mount”
  5. Under Filesystem, select “ext4” (Or whichever you’ve chosen)
  6. Check “Use as root filesystem”
  7. Press “Save & Apply”
  8. Reboot for the changes to take effect

Note, you should do this prior to any other step.  The USB will replace the standard overlay for storing your settings, so doing it later will be messy.

Connecting to the Internet (via your home WiFi)

  1. In Luci Top Tabs -> Network -> Wifi
  2. Click “Enable” on the radio
  3. Once the radio is enabled, click “Scan”
  4. If you see your home network, click “Join Network”
  5. Enter your WPA passphrase
  6. Leave other settings the same and click “Submit”
  7. Now press “Save & Apply”
  8. You should now be connected

Tricks with the LED

Turn blue led on :

echo "1" > /sys/devices/platform/leds-gpio/leds/tp-link:blue:system/brightness

Turn blue led off :

echo "0" > /sys/devices/platform/leds-gpio/leds/tp-link:blue:system/brightness

Blink blue led on/off :

cd /sys/devices/platform/leds-gpio/leds/tp-link:blue:system/
echo timer > trigger
echo 100 > delay_on
echo 100 > delay_off

Note : The delay_on value must be less than 255

More

More tricks and quick how-to guides coming up including installing additional software and setting up a webcam streaming.  For those who know how or can figure out how, the images point to a software repository where you can install more software once you have internet access!

Up! Mini 3D Printer Sneak Peek Preview

Upfront disclosure : I am/was/is/might be a reseller/affiliate/enthusiastic end user of the pp3dp Up! printer. Though these connections are how I managed to get my grubby little hands on an Engineering prototype of the Up! Mini printer.  Those who know me will see that the following is an unbiased opinion, or it should be obvious from all the semi-negative points.

The Up! Mini is listed on pp3dp’s blog as to be revealed at “Rapid 2012” in Atlanta on May 22, but since Australia is nicely ahead of the rest of the world I think the first unveiling was actually at CeBIT Australia 2012 by the Oceania Distributor 3D Printing Systems.  Seeing the printer at an expo is one thing, getting a hands on feel is much more satisfying. I had the printer at my disposal for the weekend, apparently I’m the first outside of pp3dp to receive one of these and I really appreciate the opportunity to peek.

I’ve owned the standard Up! Since Sep 2010 when it was first released and have managed to entice a number of people with the printer (~10 Up! owners within the Sydney Hackerspace) since then. The Up! Mini is the first refresh since almost two years of a proven and reliable 3D printer design.

Photos :

Error: the communication with Picasa Web Albums didn’t go as expected. Here’s what Picasa Web Albums said:


Error 404 (Not Found)!!1

404. That’s an error.

The requested URL /data/feed/api/user/114506261366431391535/album/UpMiniPreview?kind=photo was not found on this server. That’s all we know.

Technical :

Lets have a look at the technical details :-

  • “Build volume” : 1.7L aka 120mm x 120mm x 120mm
  • Layer height / resolution : 0.25mm, 0.30mm, 0.35mm
  • Enclosed Build Chamber
  • Steel sheet metal construction
  • Heated build platform
  • Intelligent auto-support generation

It is clear from the design and build that the Up! Mini shares a history with the Up! One of the best features of the Up! printer compared to the competition is that it is truly plug and play and ready to print, that tradition is carried over to the Up! Mini through the use of the same software with auto-support generation. It is simply load a model and press print.

There are a few incremental design ‘improvements’ such as the heated build platform. It is now a PCB platform with a distributed heating element/track to provide for a more consistent platform temperature. I put ‘improvements’ in quotations, because while this is good in theory, I couldn’t get a decent result in my quick tests with significant warping.

Initial Thoughts :

Many people are familiar with the Up! so lets iterate through the differences and other noticeable things I noticed during my short hands-on experience. “(-)” denotes that I see it as a negative, “(+)” for those I think is a positive and (^) is like a ‘meh’.

  • Fully enclosed sheet metal body
    • (+) The printer looks much more professional and polished and sits well within a home or office environment without raising eyebrows.
    • (-) I can’t see the print anymore! Maybe pp3dp can consider a clear/translucent front cover.
  • Lack of a filament feeder
    • (^) The load of pulling the filament is now up to the extruder stepper, it seems to be handling the load just fine but …
    • (+) It is quieter at least with one less noise source
    • (-) The power out connector is missing now, it would have been good even as an optional add-on.
  • Smaller build area / volume
    • (-) For me this is a minus as I’ve been craving for a larger build area for a long time. Though I am wary of large advertised build areas and keep reminding people to ask “can it really print to the full envelope?” [Hello BFB, I’m looking at you] [Though the new BFB new platform + PLA support is pretty cool]
  • Linear bearings on rods vs linear slides
    • (^) Meh, no comment yet.
  • PCB Heated Platform
    • (+) The platform has been redesigned to be a PCB with a heated track to distribute heat more evenly, but apparently the new heat temperature is only 50 C.
    • (+) The build platform slides onto the heated platform and is held in place by metal brackets. No more annoying screws or messy clips.
    • (+) The new platform temperature is only 50 C makes it much more friendly to handle for the mass market. Though I do have reservations on this temperature.
    • (-) Where did the temperature sensor go? Self regulating temperature you say? I don’t believe you…
  • Printed Extruder Mount
    • (-) In the Engineering prototype I had, the extruder mount was 3D printed and the extruder simply clips on. Whilst this seems like a good idea, the prototype had a fair bit of give in the mount affecting the print quality. Hopefully this gets fixed before production units.
  • The filament spool is now mounted at the back
    • (-) It might make it more neat and compact, but makes maintenance of knowing when a spool is almost finished and actually changing it out a bit trickier.
  • The RRP is 995AUD, USD pricing is similar (slightly less)
    • (+) Wow that is cheap/good value/awesome. Impulse buy range for a lot of people now…

Video :
Of me using the printer “out of the box”, with a couple of ‘DUH’ fails on my part thinking that I’m an experienced user and that I don’t need to follow the manual (e.g. I forgot to install the USB drivers).

http://www.youtube.com/watch?v=szUmC37N9aY

Verdict (a pretend one, a bit unfair to have a verdict on an Engineering prototype) :

The Up! Mini is obviously a consumer orientated 3D printer, with good aesthetics and the enclosure to provide a more polished professional look. The price has significantly been slashed in response to the competition, and to match it has lowered the bar slightly in my opinion. The Up! Mini is NOT an upgrade for existing Up! owners in my opinion, the name implies it is a lower end model for the price conscious consumer.

To me, it is intended to challenge the ‘Cubify’ from 3D Systems and from what I’ve seen, the Up! Mini is a winner with a lower initial cost as well as cheaper (though still relatively expensive) running costs (filament).


EDIT : If you buy an Up! from 3D Printing Systems, use my affiliate code 😉

http://store.3dprintingsystems.com/index.php?route=product/product&product_id=42&tracking=4f6ba0ffd6ee1
Quick Post – Up! 3D prints with updated fan holder

Just a quick post on the new fan holder (aka “Wind Barrier V7”) for the Up! pp3dp printer that I’ve been trialling for a couple of days.  The previous holders blew onto the extruder heatsink whereas the new design blows partially onto the model.

I’ve had the design for a while now but have been procrastinating and sat on it for a while.  That is until seeing how well an Ultimaker worked with its ducted fan attachment.

Jumping to the results, it actually works alot better!

  • The models come off the supports really easily now <— This is the most noticeable
  • ‘Undersides’ and supported surfaces are alot cleaner now
  • There appears to be reduced warp, since the top layer is cooled down immediately after extrusion.

Off topic, but there is a duck in those photos… it looks a bit weird but its a prototype.  Plus the weird details like the screw thread attachment serves  well to show how cleanly the supports come off now (I only used my hands in all the photos below!  Seriously!)

Photos after the break.

OddBot LaunchPad

The ‘OddBot‘ is a Mecanum wheel base derived from Madox Rover. The design is similar but the OddBot has far superior documentation and more practical mounting arrangements.  The common ‘flaw’ is that they both use a rather expensive controller (Chumby), the OddBot LaunchPad is a replacement controller that costs $4.30 shipped.  The demonstration here uses a cheap eBay Wireless NunChuk as the controller, though this component is not necessary if sensors and other controls are connected to the Launchpad. This brings the electronics cost of the platform to approximately $20 [$13.60 (Servos) + $4.30 (Launchpad) + $2.00 (Battery Holder + Wires)]. The 3D printing cost is probably in the order of $5-$10.

The files for the OddBot Launchpad are supplementary to the OddBot and does not contain the 3D files for the wheels etc.

The files are located on Google Code :-

http://code.google.com/p/madox/source/browse/#svn%2Ftrunk%2Foddbot-launchpad

The code is written for mspgcc ‘Uniarch’ with a Makefile to install the program using Ubuntu + mspdebug.

This demonstration was mainly an exercise for me to familiarise myself with the msp430 LaunchPad + value line chips.  What little “documentation” there is exists in the comments of the oddbot-launchpad.c file.

As usual there is an imperfect demonstration video that goes with it (the rotate is in the wrong direction in the video) :-