Concept
The concept is a mechanical iris diaphragm, similar to those in cameras but on a much larger scale. If you’re a Stargate fan, you would have think this is a much SMALLER scale version of the Stargate iris, then I would say that only has 20 blades…mine has 24!

There’s not much design detail out on the web, or at least no design drawings to plagiarise but I’ve seen enough stargate to try design something up myself…
Design
I used Alibre Design Xpress which is a free 3D Parametric Modeler program. One of the great things about it is that it is not feature stripped as most ‘free’ versions of commercial programs are. With a very easy to use sketcher, and the parametric nature of the program, the entire iris design was completed in less than an hour. Most of that time was probably spent tweaking the parameters to make it look good 🙂 One of the design constraints I placed upon myself was to make it a low volume design to minimise the 3D printing costs, hence the odd size.
The mechanical iris diaphragm will ‘open’ or ‘close’ as the outer ring is rotated around the inner ring depending on the direction of travel. The dynamics of the design was helped by the assembly module of Alibre Design Xpress. By constraining the pins of the blades to the holes and slots of the rings, I could simply move the ring in the model and watch the blades all move in unison as they are meant to.
Since this is just a proof of concept and I wanted to sleep (~1am by now), I didn’t bother with niceties such as putting covers on the rings to make them look nicer. The reverse side is going to be ugly…and it’ll show later on.
Before anyone critiques me on the ‘too long blades’, I did intend them to be that way. I’ve always thought the Stargate iris looks cool and wondered if it’ll actually fully close.
Ordering
Shapeways accept files in STL format a defacto standing in 3D printing, and luckily Alibre Design Xpress exports in STL! Unfortunately the validator at Shapeways didn’t like the STL Alibre exports in… wasted a fair bit of time googling for a solution…
Meshlab to the rescue! An open source processing and editing program for STL files, where all it took was simply opening the Alibre STL file, answering the ‘do you want to fix ***’ prompt, then saving. The resultant STLs was was much smaller than the original and upload to Shapeways validated!
Payment was easy with Paypal and major credit cards as options. Another fantastic thing about Shapeways is that you don’t have to worry too much about ridiculous shipping costs. All pricing includes worldwide shipping – a good change since I’m used to seeing $10 bargains with $195 shipping costs attached (Australia…on the fringe of civilisation… [Yes it’s still part of civilisation]).
Ended up ordering 2 sets of blades at slightly different thicknesses, but woohoo…order complete in under 2 hours!
Delivery / Final Product
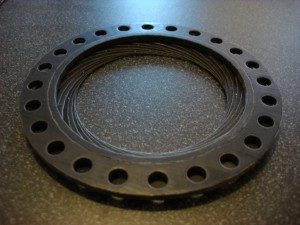
This is the reversed side…
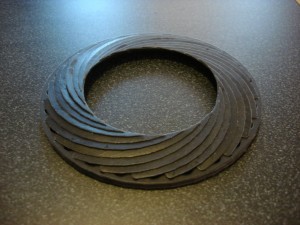
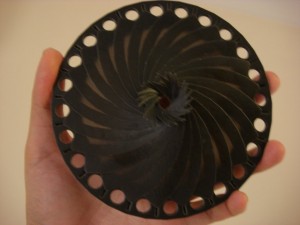
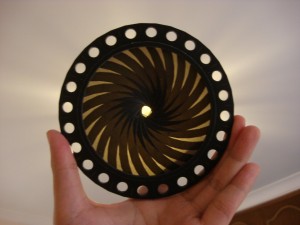
What did I learn?
- The black detail material is actually quite springy and not very rigid. I expected this (in fact hoped for it) for the really thin blades, but the inner ring was packed as an ellipsoid in the packaging 🙂 Which made trying to bend it back into shape and fitting it into the outer ring a bit annoying.
- I need to add more clearance to parts I intend to have mechanically move 🙂 The pins fit and slide into the slots perfectly… but the pivot pins and the inner/outer ring don’t really rotate … need to do some sanding I think.
- The black detail print requires support material and alot of that stays with the model if not cleaned off…
- You can actually notice the ‘print lines’ that mark the pieces.
- I couldn’t fully close it…and I shouldn’t force it closed with such a flimsy plastic…aka I broke a pin off a blade by forcing it too hard… lucky I bought a spare set of blades 🙂
What’s next?
Engineers and jewelry don’t mix right?… Who knows with 3D printing this easy and companies that offer 3D jewelry wax printing… hmmmmm
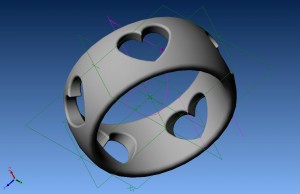
This is a little ring I concocted up against very quickly using Alibre Design Xpress…
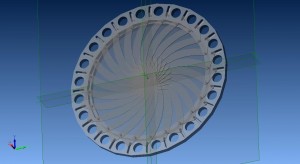
Edit : I figured out the problem with the tesselation of the iris rings, will be fixing and improving the design again for a round 2!
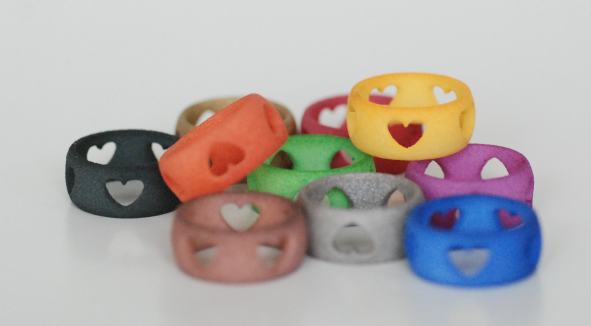
Edit 2 : I just ran into the photo of someone painting the ‘heart ring’ 🙂 They look so cute… mmm almost like candy…mmm hungry…
You have some very nice work, I am also excited with the advent of 3D production… for now, I have to be content with turning 2D boards into 3D objects but being able to skip that process would be a very liberating experience, as you have found!
Jon
http://WoodMarvels.com – Create Unique Memories
Hi, Very interested in the iris diaphragm have an application for this and would solve a technical problem we currently have. Can I get more information or a contact.
Regards
Colin Nicholson
Pipeworks Ltd, New Zealand
Wow, that’s a really slick design!
If you are a SG fan you might like my website.
Rex
Btw That iris design is awesome!
That’s a product plug Rex! But its a cool product plug 🙂 You might as well say how much it is…is it licensed?
PS Check out the new design at …
http://www.madox.net/blog/2008/12/04/rapid-prototyping-mechanical-iris-diaphragm-new-improved/
I severely need something like that, only smaller. Do you sell them from Shapeways?
Hi, if you’re after optical apertures or neat little iris diaphragms, can I suggest :-
http://www.edmundoptics.com/onlinecatalog/browse.cfm?categoryid=267
Very reasonably priced…
I would like to buy the rapid prototype soft ware program thanks
Sir I need your help, I want to do a report that discusses the design of the iris mechanism. but I am confused what calculation formulas should I discuss in the report?